Steve MarlinUpdated:
Category:
BJJ.
I remember my first week at the academy, got put in side control, couldn’t breathe, couldn’t move, and honestly? I thought I was going to pass out.
Sound familiar?
You’re not alone.
Welcome to Martial Boss, your go-to source for real martial arts knowledge, no fluff, no fake hype. Just clear, proven techniques that work on the mat and in life.
Today, we’re tackling one of the most frustrating positions in BJJ: side control.
And more importantly, how to escape it.
This isn’t just a list of moves.
It’s a complete blueprint.
One I’ve used myself and taught to hundreds of students, to turn panic into power.
Let’s get you off your back and back in control.
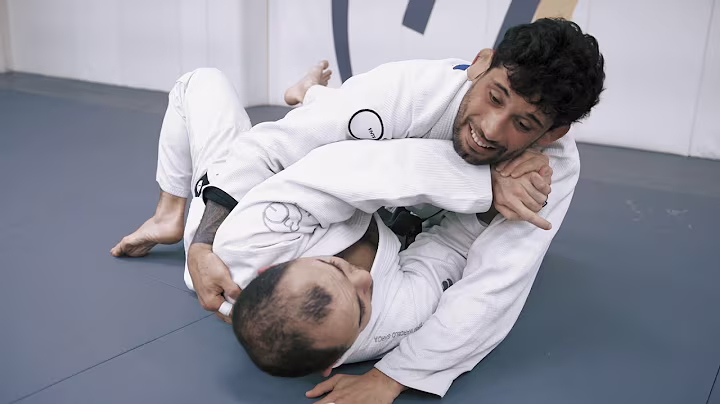
Imagine this:
You’re lying on your back.
Someone is lying across your chest, perpendicular, with all their weight driving down from the side.
That’s side control.
It’s not just uncomfortable, it’s dangerous.
From here, your opponent can:
And worst of all?
You feel helpless.
I’ve been crushed by guys 50 pounds heavier than me.
But guess what?
Size doesn’t decide who wins.
Technique does.
Side control comes in different flavors:
All of them share one goal:
To shut you down.
But here’s the good news:
Every dominant position has a weakness.
And side control?
Its biggest flaw is balance.
Lean too far forward? You can bridge.
Press too hard on one arm? You can shrimp.
Your job isn’t to fight force with force.
It’s to find that tiny window, and explode through it.
Before we dive into specific escapes, let’s talk about why some people escape easily, and others stay stuck forever.
It’s not strength.
It’s not flexibility.
It’s principles.
Think of these like rules of gravity in BJJ.
Break them, and you fail.
Follow them, and even a small person can escape a giant.
You ever try to push a car with your bare hands?
Yeah, not happening.
Same thing when you’re under side control.
Trying to shove someone off with weak muscles won’t work.
Instead, use your bones.
That’s called framing.
Place your forearm across their hip.
Use your bicep to block their chest.
Push against their neck if they’re leaning in.
These are your “levers.”
They don’t need strength, just proper placement.
I call it the T-Rex arms rule:
Keep your elbows tight to your body.
Flare them out, and you lose structure.
Keep them in, and you become unbreakable.
Here’s a truth bomb:
No one escapes side control by bench-pressing.
The real movement happens in your hips.
Two key actions:
Your arms set the frame.
Your hips do the escaping.
It’s like digging a tunnel under prison walls.
You don’t attack the guard head-on.
You sneak past using timing and angles.
Same here.
Move your hips early, and you’ll surprise even advanced opponents.
Ask yourself:
What’s better than being stuck on your back?
Having your legs between you and your opponent.
That’s guard.
Closed guard. Open guard. Half guard.
All of them give you control, options, and safety.
So most escapes aren’t about taking the back or standing up immediately.
They’re about getting back to guard.
Once you’re there, you can sweep, submit, or reset.
Never forget:
Guard is defense.
But it’s also offense in disguise.
Panic is the number one reason beginners fail.
Heart racing.
Muscles locked.
Breathing shallow.
I’ve seen purple belts freeze like white belts when pressure hits.
Here’s what works instead:
Take a breath.
Feel their weight.
Wait for the shift.
When they adjust their grip?
That’s your moment.
When they look to pass?
That’s your opening.
Escaping isn’t about constant motion.
It’s about smart motion.
Like a surfer waiting for the right wave, you don’t paddle nonstop.
You wait… then go.
Now that you know the why, let’s cover the how.
These are the exact escapes I teach in class.
Each one builds on the principles above.
Start with the basics.
Master them.
Then add the advanced ones.
This is your bread and butter.
If you only learn one escape, make it this.
Use it when:
Steps:
Common mistake?
Shrimping into them.
Always shrimp away from the pressure.
Do this drill 10 times after every class.
It’ll change your game.
Ah, the upa.
The move that saved me during my first tournament.
Best used when:
Steps:
Key tip:
Don’t bridge straight up.
Bridge at a 45-degree angle, toward their head.
I once rolled a 250-pound guy using nothing but timing and this angle.
Strength had nothing to do with it.
This one’s underrated.
But it works like magic when done right.
It combines the shrimp with a smart knee insertion.
Steps:
Why it works:
That knee acts like a doorstop.
It stops them from flattening you while you recover.
Practice this slowly at first.
Then speed it up under light pressure.
Now we’re getting spicy.
This one’s for when your arm is trapped under their body.
Don’t panic.
Use it as a lever.
Steps:
Warning:
This takes practice.
If you miss the angle, you might end up in worse trouble.
But when it clicks?
It feels like a ninja move.
I learned this from a black belt who escaped four side controls in one round using just this.
Not flashy. Just effective.
Let’s be honest, some escapes fail.
Not because you’re bad.
But because the situation changed.
Here’s how to adapt when the plan falls apart.
I get it.
You shrimp.
Nothing moves.
You bridge.
They don’t budge.
Feeling stuck? Good. That means you’re learning.
Against heavier opponents, strength won’t save you.
But leverage will.
Try this:
I once escaped a 6’4”, 280-pound guy by moving less than six inches total.
Small shifts. Perfect timing.
That’s all it took.
Ah, the cross-face.
The move that makes you see stars.
When someone wrenches your head sideways, it’s not just painful, it weakens your entire frame.
So protect yourself first.
Do this:
Never try to escape flat-faced.
Fix your head position first.
Everything else follows.
This one sounds made up.
But I’ve used it in live rolls, and it works.
The Ghost Escape is a last-ditch move when your arms are pinned and you can’t create space.
Here’s how:
It’s like dodging a punch and slipping inside.
You don’t overpower them, you slip through the gap.
Warning: Don’t overuse it.
But when you’re truly trapped?
It feels like magic.
Side control isn’t static.
Smart opponents switch positions.
If they turn into scarf hold (kesa-gatame):
If they go to north-south:
Key point:
The same principles apply, frame, move hips, stay calm.
Just adjust the angle.
I’ve coached hundreds of students.
And these mistakes?
They show up every single time.
Let’s fix them now.
Panic kills escapes.
You freeze.
You gas out.
You tap from exhaustion, not technique.
Fix:
Breathe.
One deep breath resets your nervous system.
Tell yourself: “I’ve done this before.”
Then move, anywhere.
Even a tiny shrimp breaks their rhythm.
Biggest error I see:
People try to shrimp or bridge without setting a frame first.
Result?
They get flattened harder.
Rule:
Frame first. Move second.
Always.
Like putting air in a tire before driving.
No structure = no movement.
Your eyes follow your movement.
Look up?
Your chest rises.
Your hips drop.
You get pinned deeper.
Instead:
Keep your gaze low.
Think about lifting your tailbone, not your head.
Your hips lead.
Everything else follows.
Ever tried the upa three times in a row?
And failed each time?
That’s overcommitting.
If one escape fails, flow into another.
Shrimp → Reguard → Trap and Roll.
Escaping is like chess.
You don’t win with one move.
You win with a sequence.
Knowledge without practice is like owning a car you never drive.
You need reps.
Lots of them.
You don’t need a partner to get better.
Try these:
Spend 10 minutes after class doing solo work.
It adds up fast.
Now add resistance.
These aren’t just drills.
They’re confidence builders.
How often should you train escapes?
Consistency beats intensity.
Ten focused minutes beat thirty mindless ones.
BJJ isn’t just one game.
It changes based on rules, gear, and goals.
In gi:
In no-gi:
My advice?
Train both.
Each improves the other.
Sport BJJ: Goal is to survive and recover guard. No strikes. Tap if needed.
MMA: You can’t tap. And punches are coming.
Your escape must include:
Self-Defense: Worst-case scenario.
Multiple attackers?
Concrete floor?
Clothes, not a gi?
Priorities shift:
Practice standing up safely from side control.
It could save your life.
Let me tell you a secret:
Big guys get tired too.
They also make mistakes.
They lean too far.
They over-grip.
They forget to balance.
Use that.
Don’t fight their strength.
Wait for imbalance.
Then strike, fast and precise.
Remember:
A small wave doesn’t sink a ship.
But constant motion wears it down.
I’ve studied under black belts.
Watched world champs roll.
And here’s what the best do differently:
Take these lessons to heart.
They weren’t built in a day.
But they’ll change your game forever.
Let’s clear up the confusion.
Q: What is the easiest side control escape for beginners?
A: The shrimp escape. It teaches framing and hip movement without needing power. Start here.
Q: Can I escape side control without giving my back?
A: Yes. Keep your near-side elbow tight and shrimp away from pressure. Control your posture.
Q: How do I escape if my arm is trapped?
A: Use the trap and roll or insert a knee shield first. Create space, then recover your arm.
Q: Is the upa effective against heavier opponents?
A: Only with perfect timing. Combine it with a strong frame and diagonal bridge. Don’t force it.
Q: How often should I practice side control escapes?
A: At least 2–3 times per week. More if you’re new. Reps build instinct.
Q: How long does it take to master side control escapes?
A: Most students see big improvement in 3–6 months. True mastery? Years. But progress starts today.
Look, I’ll be straight with you:
You will get put in side control.
Again and again.
But now?
You know how to get out.
Not by luck.
Not by strength.
But by principle, practice, and patience.
Remember the four pillars:
Master these, and no one stays on top of you for long.